Replacing a headlight bulb is a straightforward process that can save you time and money compared to taking your car to a mechanic. This detailed guide will walk you through the steps to replace a headlight bulb safely and efficiently.
How to Replace Headlight Bulb Properly
-
New headlight bulb (check your vehicle’s manual for the correct type)
-
Screwdriver (if required)
-
Gloves or a clean cloth
-
Flashlight (optional for better visibility)
Preparation Steps
1. Purchase the Correct Bulb
-
Check your owner’s manual or consult with an auto parts store to ensure you get the right replacement bulb for your vehicle.
2. Park Safely
-
Park your car on a level surface, turn off the engine, and engage the parking brake.
-
Ensure the headlights are switched off to avoid electrical issues.
3. Open the Hood
-
Locate the hood release lever inside your car, usually near the driver’s side footwell.
-
Pull the lever and open the hood, securing it with the hood prop or support.
Steps to Replace the Headlight Bulb
1. Access the Headlight Assembly
-
Locate the back of the headlight assembly inside the engine bay. It’s usually accessible without removing other components, but some vehicles may require removing a cover or panel.
2. Disconnect the Power Connector
-
Identify the power connector at the back of the headlight. It’s typically a plastic plug with wires attached.
-
Press the release tab on the connector and pull it straight off. Be gentle to avoid damaging the wiring.
3. Remove the Old Bulb
-
Depending on your vehicle, the bulb may be secured with a clip, screw cap, or twist-lock mechanism.
-
Release the clip or twist the bulb counterclockwise to remove it from the assembly.
-
Handle the bulb by its base, not the glass, to avoid transferring oils from your skin.
4. Install the New Bulb
-
Remove the new bulb from its packaging, handling it with gloves or a clean cloth to prevent contamination.
-
Align the bulb’s base with the socket and insert it. If it’s a twist-lock type, turn it clockwise to secure it.
-
Reattach the clip or cap if required.
5. Reconnect the Power Connector
-
Plug the power connector back into the bulb’s base until it clicks securely.
-
Ensure the connection is tight to avoid flickering or malfunction.
6. Test the Headlight
-
Turn on your vehicle’s headlights to check if the new bulb is functioning correctly.
-
If it doesn’t work, double-check the installation and connections.
7. Reassemble Any Removed Components
-
If you removed a cover or panel to access the bulb, reinstall it securely.
-
Close the hood and ensure it’s latched properly.
Tips and Precautions
-
Avoid Touching the Bulb Glass: Oils from your skin can cause the bulb to overheat and reduce its lifespan.
-
Replace in Pairs: It’s often a good idea to replace both headlight bulbs at the same time to ensure even lighting.
-
Check Alignment: After replacing the bulb, ensure the headlight beam is aligned correctly. Misaligned headlights can impair visibility and distract other drivers.
-
Keep a Spare Bulb: Having an extra bulb on hand can save you time in case of a future failure.
When to Seek Professional Help
-
If the headlight assembly is difficult to access or requires significant disassembly, consider consulting a professional mechanic.
-
If the new bulb doesn’t work despite proper installation, there may be an issue with the wiring or fuse.
By following this guide, you can confidently replace a headlight bulb and keep your vehicle road-ready. Safe driving!
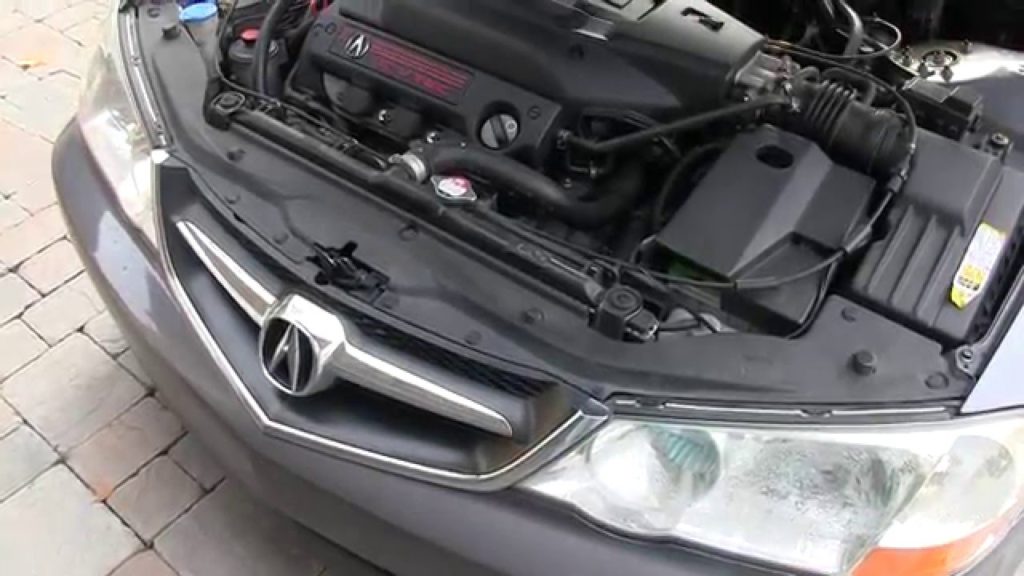
2003 Acura Tl Low Beam Headlight Bulb Replacement
If you own a 2003 Acura TL, then you know that one of the most important parts of the car is the headlights. Not only do they help you see at night, but they also make your car look great. Unfortunately, over time, the bulbs in your headlight can burn out and need to be replaced.
Luckily, this is a relatively easy task that anyone can do with just a few tools. To start, open up your hood and locate the headlight assembly. Once you have found it, twist off the plastic cover on top to reveal the bulb.
Next, disconnect the electrical connector from the back of the bulb and carefully remove it from the socket. Now simply insert your new bulb into the socket and reconnect the electrical connector. Finally, replace the plastic cover on top of the headlight assembly and close up your hood.
That’s all there is to it! In just a few minutes time, you’ve successfully replaced a burned out headlight bulb on your 2003 Acura TL.

Credit: www.amazon.com
Can I Replace a Headlight Bulb Myself?
Headlight bulbs may seem like a small and insignificant part of your car, but they actually play a very important role. Not only do they help you see at night, but they also make your car more visible to other drivers, which can help prevent accidents.
Headlight bulbs typically last for around 1,000 hours, so it’s not unusual to have to replace them at some point.
Luckily, replacing a headlight bulb is usually a pretty easy task that most people can do themselves. If you need to replace a headlight bulb, the first thing you’ll need to do is locate the bulbs. On most cars, the headlight bulbs are located in the front of the car behind the headlights.
You may need to remove a piece of plastic or metal trim in order to access the bulbs. Once you’ve found the bulbs, simply twist them counterclockwise and pull them out.
Then insert the new bulb into the socket and twist it clockwise until it’s tight.
Be sure not to touch the glass part of the new bulb with your fingers – if possible, use gloves or a clean cloth when handling it. Once the new bulb is in place, reassemble everything and test your headlights to make sure they’re working properly before driving again.
Will Autozone Change Your Headlight Bulb for You?
Yes, AutoZone will change your headlight bulb for you. They have the tools and expertise to do so quickly and efficiently.
How Do I Replace My Headlight Bulb?
Headlight bulbs may burn out over time, but fortunately, they are easy to replace. You will need a new headlight bulb, a screwdriver, and a pair of pliers. First, open the hood and locate the headlight assembly.
On most cars, there will be a plastic cover that needs to be removed in order to access the headlight bulb. Use your screwdriver to remove the screws or clips holding the cover in place, then carefully pry it off. Once you have access to the headlight bulb, disconnect the electrical connector by pressing down on the tab and pulling it off.
Then, use your pliers to twist and remove the old bulb from its socket. Now it’s time to install the new bulb! Start by inserting it into the socket and twisting it until it clicks into place.
Reconnect the electrical connector, making sure that it is firmly attached. Finally, put the plastic cover back on – start with any screws or clips that were already in place before pushing any others back into place. That’s all there is to it!
Is It Easy to Replace Headlights Yourself?
If your car has halogen headlights, then replacing them is a pretty easy task that most people can do themselves. All you need is a screwdriver, and the replacement bulbs. You can find replacement bulbs at most auto parts stores.
If your car has HID (High Intensity Discharge) headlights, then it’s a little more complicated. These types of headlights use a different type of bulb, and they require some special tools to replace them. Most people are not comfortable doing this type of repair themselves, and will take their car to an automotive shop that specializes in headlight replacement.
Acura TL Headlight Replacement (WITHOUT removing the bumper)
Conclusion
The headlight bulb on your 2003 Acura TL may need to be replaced at some point during the life of the vehicle. Here’s a quick guide on how to replace it. You’ll need a new headlight bulb, a screwdriver, and a few minutes of time.
First, open the hood and locate the headlight assembly. There will be a small access panel that you can remove with a screwdriver. Behind this panel, you will see the back of the headlight bulb.
Using a screwdriver, carefully disconnect the electrical connector from the back of the old bulb. Then, twist counterclockwise and pull out the old bulb from its socket. Insert the new bulb into the socket and twist it clockwise until it is tight.
Reconnect the electrical connector and replace the access panel. Close the hood and you’re done!