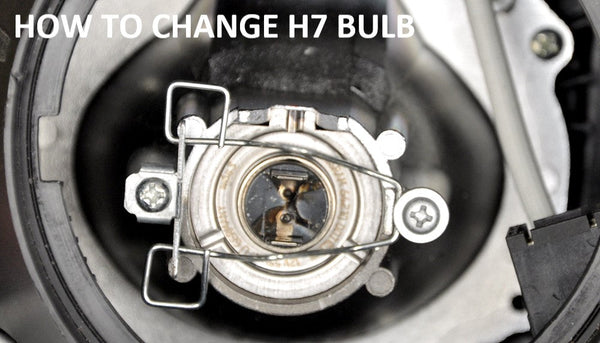
To remove an H7 bulb, first unplug the electrical connector. Then, release the retaining clip and pull out the bulb.
Changing an H7 bulb in your vehicle is a straightforward task that most people can handle themselves. The H7 bulb is commonly used in headlights, offering bright and reliable illumination. Knowing how to replace it can save you time and money on mechanic fees.
This guide will help you understand the simple steps required to safely remove and replace the H7 bulb. Proper maintenance of your vehicle’s lighting system is crucial for safe driving, especially at night or in adverse weather conditions. Follow these steps to ensure your headlights are functioning correctly and providing optimal visibility.
Introduction To H7 Bulbs
H7 bulbs are common in cars and motorcycles. They provide bright and clear light. Many people use them for headlamps and fog lights. These bulbs help drivers see better at night. They also make vehicles more visible to others.
Most vehicles use H7 bulbs for low beams. They are also used in high beams and fog lights. Some bikes use them for extra visibility. These bulbs are popular because they are reliable and bright.
Proper handling of H7 bulbs increases their lifespan. It prevents damage and ensures they work well. Always wear gloves when handling. This keeps oils from your skin off the glass. Clean bulbs provide better light. Careful handling also ensures safety.
Preparation For Bulb Removal
First, get all the tools ready. You will need a flathead screwdriver. Also, have gloves to protect your hands. Ensure you have a clean cloth. This will help keep the bulb clean. Put all the tools in one place. You are now ready to start.
Always turn off the power before starting. This prevents any electric shock. Wear gloves to protect your hands. Do not touch the bulb with bare hands. It can get very hot. Keep water away from the area. Water and electricity are dangerous together. Make sure the area is well-lit. This helps you see what you are doing.
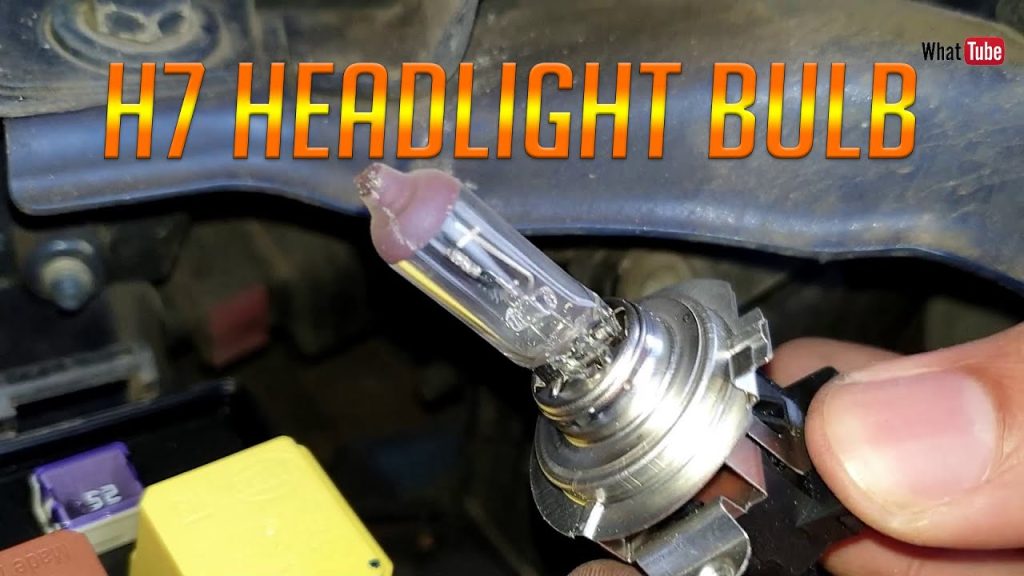
Identifying The H7 Bulb Socket
First, open your car’s hood. Look for the headlight assembly. The headlight assembly is usually at the front. You might need a flashlight to see clearly. Find the back of the headlight housing. The H7 bulb is inside this housing. Disconnect the power connector. This step is crucial for safety. Make sure your car is off before touching any parts.
There are different socket types. The H7 bulb has two prongs. It fits into a specific type of socket. Some sockets twist to lock the bulb in place. Others might have clips or screws. Check your car’s manual to know the exact type. Knowing the socket type helps in removing the bulb easily. Use the right tools if needed. Safety first, always.

Credit: celicahobby.com
Initial Steps To Remove The Bulb
Turn off the power supply to the light fixture. This step is crucial to avoid electric shocks. Locate the main switch and turn it off. Make sure the power is completely off. This ensures your safety during the process.
Wait for the bulb to cool down before touching it. Bulbs can get very hot when in use. Touching a hot bulb can cause burns. It’s best to wait for a few minutes. This will ensure the bulb is safe to handle.
Accessing The H7 Bulb
Gently twist the H7 bulb counterclockwise to release it from the socket. Carefully disconnect the wiring harness to complete the removal. Ensure hands are clean to avoid damaging the new bulb.
Removing Obstacles
First, open the car hood. Locate the headlight housing. Remove any covers or panels. This will expose the bulb area. Unclip or unscrew any fasteners. Ensure you have clear access to the bulb socket.
Gaining Clear Access
Disconnect the battery to avoid shocks. Move any wires or cables out of the way. Ensure no debris or dirt is present. This will help you see the bulb clearly. Now you are ready to remove the H7 bulb.
The Removal Process
Start by turning off the car’s engine and opening the hood. Locate the headlight assembly and find the back of the H7 bulb. Hold the bulb’s base firmly and twist it counterclockwise. Twisting helps to unlock the bulb from its socket. Gently twist until you feel the bulb loosen. Once loose, you can move to the next step.
After twisting, gently pull the bulb straight out from the socket. Avoid using excessive force to prevent damage. Hold the bulb by its base to ensure a firm grip. Carefully pull the bulb completely out of the socket. Dispose of the old bulb according to local regulations. You have now successfully removed the H7 bulb.
Handling The Bulb After Removal
Never touch the glass part of the bulb. Use a clean cloth or gloves to handle it. Fingerprints can damage the bulb. Oil from your skin can cause it to overheat. Always hold the bulb by its base or metal part.
Store the bulb in its original packaging. Keep it in a cool, dry place. Do not store it near flammable materials. For disposal, check local recycling rules. Many bulbs can be recycled. Do not throw them in regular trash bins. Proper disposal protects the environment.
Troubleshooting Common Issues
Easily remove an H7 bulb from its socket by turning it counterclockwise and gently pulling it out. Ensure the car is off to avoid electrical hazards.
Dealing With A Stuck Bulb
Sometimes, the H7 bulb can get stuck in the socket. Start by turning off the power to avoid any electrical hazards. Use a pair of gloves to get a better grip. Gently twist and pull the bulb. If it still does not move, try using a small amount of lubricant around the base. Make sure to wipe off any excess lubricant before trying again.
What To Do If Bulb Breaks
Safety first! Wear protective gloves and safety glasses. Use a pair of needle-nose pliers to carefully remove the broken pieces. Be sure to turn off the power before you start. Dispose of the broken glass in a safe container. Check for any remaining glass shards in the socket and remove them.
Installing A New H7 Bulb
Ensure the bulb fits the socket perfectly. The grooves on the bulb should match the socket notches. Do not force the bulb into place. Gently rotate it if it does not fit. The alignment is key to proper installation.
Check the connection is tight. Loose connections can cause the bulb to flicker. The clips or screws should hold the bulb firmly. Test the bulb by turning on the lights. If it works, the connection is secure.
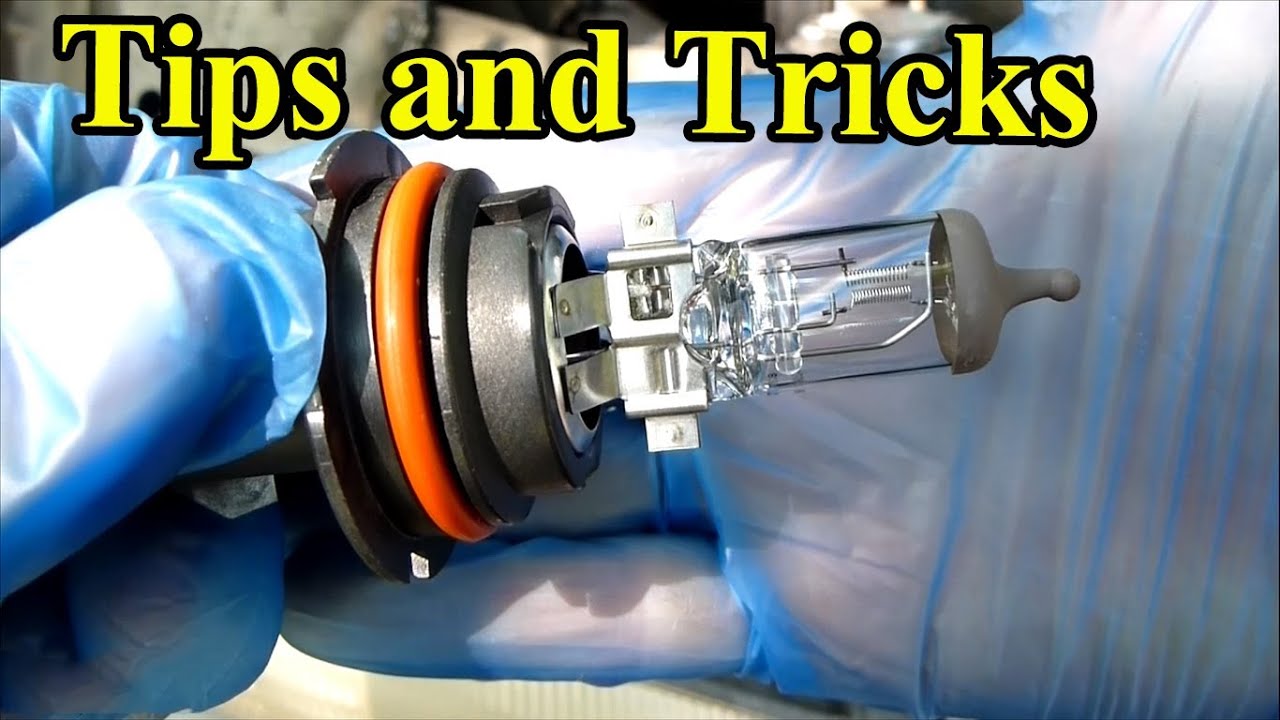
Credit: m.youtube.com
Final Checks And Testing
Ensure that the new bulb is snug in its place. Check for any loose connections around the socket. Make sure all components are properly secured. Look for any visible damage to the wires. Inspect the bulb to confirm it is seated correctly. Double-check the socket for stability. Proper installation is key to avoid future issues.
Turn on the headlights to test the new bulb. Ensure it lights up immediately. Compare the brightness with the other headlight. Observe the light pattern to ensure it’s even. Check both high and low beams for proper functionality. If there are issues, recheck the connections. Testing ensures the bulb works as expected.
Tips For Longevity And Maintenance
Check the bulb regularly to ensure it is working well. Look for any signs of damage. Replace the bulb if there are any cracks. Make sure the socket is not loose. A loose socket can cause problems.
Always turn off the power before cleaning. Use a dry cloth to clean the contacts. Avoid using water or wet cloths. Clean the socket gently. Make sure it is dry before putting the bulb back. Clean contacts help the bulb to last longer.
Credit: www.lasfit.com
Frequently Asked Questions
How To Take An H7 Bulb Out?
First, turn off the vehicle and open the hood. Locate the headlight assembly. Twist the bulb socket counterclockwise and pull it out. Remove the H7 bulb by gently pulling it out from the socket. Replace with a new bulb by reversing these steps.
How To Remove H7 Bulb From Connector?
To remove an H7 bulb, first, turn off the car and open the hood. Locate the bulb, twist it counterclockwise, and pull it out. Disconnect the wiring harness by pressing the release tab.
How To Unclip A Headlight Bulb?
To unclip a headlight bulb, first disconnect the power connector. Then, release the metal clip holding the bulb. Carefully remove the bulb from the socket. Always wear gloves to avoid touching the new bulb directly.
How Do You Remove A Bmw H7 Bulb?
To remove a BMW H7 bulb, open the hood, locate the headlight cover, twist and remove it, disconnect the bulb, and replace.
Conclusion
Removing an H7 bulb from its socket is straightforward with the right steps. Always ensure your car is off and the bulb is cool. Follow the guide carefully, and you’ll have your bulb replaced in no time. Proper maintenance keeps your vehicle safe and your headlights shining brightly.