Removing an Alpine car stereo requires care, patience, and the right tools to ensure you don’t damage the unit or your vehicle’s dashboard.
Follow this step-by-step guide to safely remove your Alpine car stereo.
-
Flathead screwdriver or plastic trim removal tool
-
Phillips head screwdriver
-
Stereo removal keys (if applicable)
-
Flashlight (optional)
-
Cloth or protective cover (to prevent scratches)
Step-by-Step Guide to Remove Alpine Car Stereo
1. Disconnect the Car Battery
-
Safety first! Disconnect the negative terminal of your car battery to avoid electrical shorts or accidental shocks during the process.
2. Remove the Dashboard Trim
-
Locate the trim panel surrounding the stereo.
-
Use a plastic trim removal tool or flathead screwdriver wrapped in cloth to gently pry the trim away from the dashboard. Be careful not to scratch the surface.
3. Locate and Remove Mounting Screws
-
Once the trim is removed, you should see the screws securing the stereo in place.
-
Use a Phillips head screwdriver to unscrew and keep them in a safe place.
4. Use Stereo Removal Keys (If Needed)
-
Some Alpine stereos require specialized removal keys. Insert these keys into the designated slots on either side of the stereo to release it from the mounting bracket.
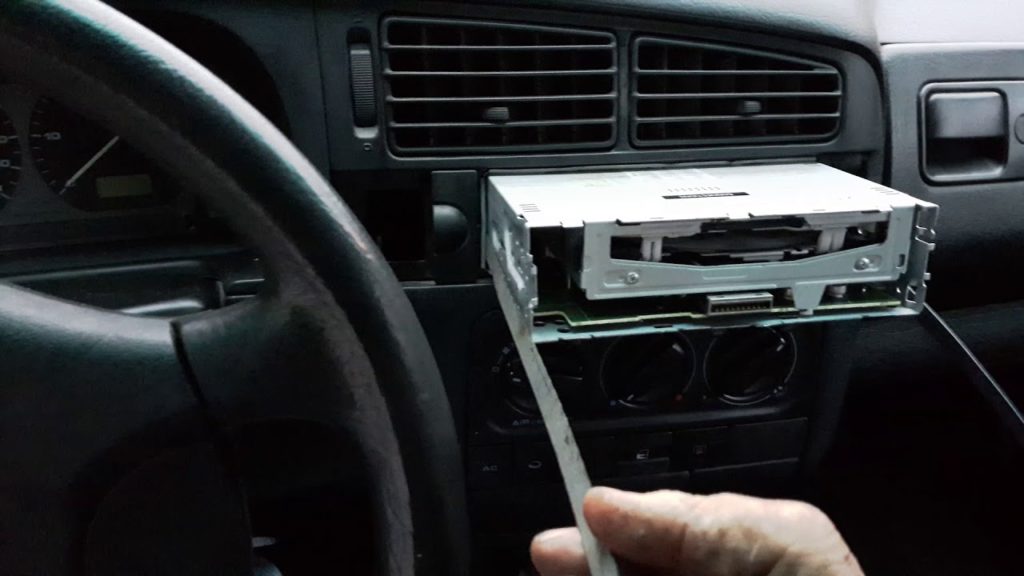
5. Gently Slide Out the Stereo
-
Carefully pull the stereo out of the dashboard. If it feels stuck, check for additional screws or clips holding it in place.
-
Avoid applying excessive force to prevent damage to the stereo or dashboard.
6. Disconnect Wiring Harness and Antenna
-
Once the stereo is partially out, you’ll see wires connected to the back.
-
Disconnect the wiring harness by pressing the release tabs and gently pulling it out.
-
Detach the antenna cable by unplugging it from the back of the stereo.
7. Remove the Stereo Completely
-
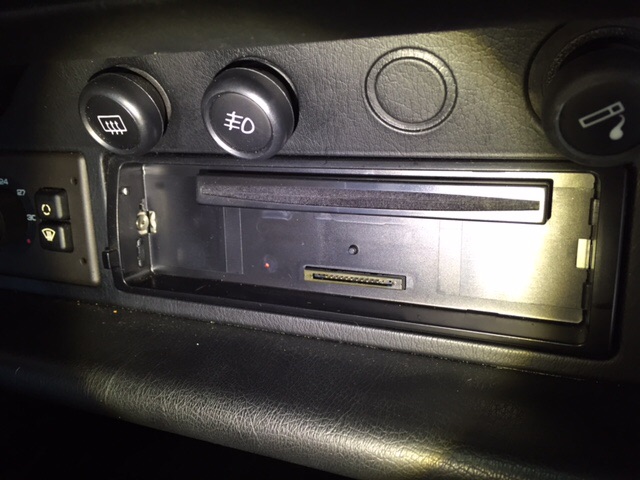
With all connections detached, you can now fully remove the Alpine stereo from the dashboard.
Tips and Precautions
-
Refer to Your Vehicle’s Manual: Check your car’s owner’s manual for specific instructions on stereo removal.
-
Label the Wires: If you’re planning to install a new stereo, label the wires for easier identification during reinstallation.
-
Handle with Care: Avoid pulling or yanking wires to prevent damage to the connections.
When to Seek Professional Help
If you encounter difficulties, such as stuck components or complex wiring, it’s best to consult a professional car audio technician to avoid potential damage.
How to Remove Alpine Car Stereo Without Keys
If you’re looking to remove your Alpine car stereo without the use of keys, there are a few methods you can try.
One is to use a small flathead screwdriver or other thin tool to pry the faceplate off the unit. This may take some patience and carefulness, as you don’t want to damage the faceplate or the unit itself.
Once the faceplate is removed, you should be able to see screws holding the unit in place. Remove these screws and carefully pull the unit out of its housing. If your model has a detachable front panel, this will come off easily at this point.
If not, you may need to disconnect wires from the back of the unit before it will come out completely. With some models, it’s also possible to remove Alpine car stereos by removing two screws on either side of the main control knob. This releases a metal bracket that holds the stereo in place.
Carefully pull the stereo out far enough so that you can reach behind it and disconnect any wires connected to it. With all wires disconnected, you should be able to remove the Alpine car stereo completely from its housing.
Credit: rennlist.com
How Do You Remove a Car Stereo Without the Tool?
Assuming you don’t have the tool, there are a few different ways you can remove a car stereo.
One way is to use a putty knife. Insert the putty knife into the seam between the stereo and the dashboard and pry gently until the stereo pops out.
Another way is to use two wire hangers. Straighten out the wire hangers and insert them into the seams on either side of the stereo. Cross the wires in the back of the stereo and pull until the stereo comes out.
How Do I Unclip My Radio?
Assuming you are talking about an emergency radio: Most emergency radios have a hand crank or solar panel that can be used to power the radio. To unclip the radio, find the release button or switch and press it.
The radio should then come off of the clip.
How Do You Take a Car Stereo Out?
Assuming you want to know how to remove a car stereo: Tools Needed: -Phillips head screwdriver
-Flathead screwdriver (optional) -Pry tool or putty knife (optional) Instructions:
1. Begin by disconnecting the negative (-) battery terminal cable to prevent any electrical shorts. You can do this by loosening the retaining nut with a wrench and pulling the cable off. If your vehicle has an aftermarket amplifier, disconnect its power wire as well.
2. Locate and remove any screws holding the trim panel or bezel around the stereo in place. These will usually be located at the edges of the panel, and may be hidden behind small plastic plugs that can be pried out with a flathead screwdriver or pry tool.
Once all screws are removed, gently pull on the trim panel to release it from any clips or fasteners holding it in place, then set it aside.
3. With the trim panel removed, you should now have access to the stereo itself. There will likely be several wires running into it from different places – simply disconnect each of these by hand by pulling on their connector plugs until they come free.
In some cases there may also be one or more screws holding the stereo in place – remove these as well before proceeding to step 4.
4(a). For stereos held in place by spring clips, grasp each side of the stereo firmly and pull straight outwards away from the dashboard until it pops free from its mounting location.
(b). For stereos held in place by bolts or nuts, unscrew each fastener with a wrench until they are loose enough to remove by hand, then pull the stereo out of its mounting location.
5(a). If your vehicle has factory navigation, there will likely be an antenna mounted on or near the back of the unit – unplug this before removing the unit completely.
(b). There may also be other cables running to other components in your dash – if so, carefully tuck these out of harm’s way so they don’t get stretched or damaged as you remove the unit.
(c). Finally, if your vehicle has an aftermarket amplifier installed, make sure all its input/output wires are disconnected before removing the head unit completely – otherwise you’ll have a lot more work ahead of you when it comes time to reinstall everything!
How Do You Remove a Faceplate from a Car Stereo?
If you’re interested in upgrading your car stereo, one of the first things you’ll need to do is remove the faceplate from the existing unit.
This can be a bit tricky, but with a little patience and carefulness, you should be able to do it without too much trouble.
Here’s a step-by-step guide on how to remove a faceplate from a car stereo:
1. Start by removing any screws that are holding the faceplate in place. These are usually located around the edges of the plate.
2. Once the screws are removed, gently pry the faceplate off from the rest of the unit. You may need to use a flathead screwdriver or something similar to help with this step.
3. With the faceplate now detached, there may be some wires still connected to it. Gently disconnect these and then set the faceplate aside.
4. Now you should have full access to the internals of your car stereo unit! Proceed with whatever upgrades or repairs you needed to do.
How to Remove an Alpine Car Deck Without Special Tools
Conclusion
In order to remove an Alpine stereo from a vehicle, the first thing that needs to be done is to disconnect the negative battery terminal. Once that is done, there will be a few screws that need to be removed in order to take off the trim panel. After the trim panel is off, there are four bolts holding the Alpine stereo in place.
Two of these bolts are located at the top of the stereo, and two are located at the bottom. Once all four of these bolts have been removed, the Alpine stereo can be pulled out and disconnected from the wiring harness.