To paint a bumper with spray cans, clean the surface and apply primer. Then, spray multiple light coats of paint and clear coat.
Painting a bumper with spray cans can be a cost-effective and satisfying DIY project. The process involves several crucial steps to achieve a professional finish. You need to prepare the bumper surface properly by cleaning and sanding it. Applying a good quality primer is essential for the paint to adhere well.
Using spray cans, apply multiple light coats of paint, allowing each coat to dry before applying the next. Finish with a clear coat to protect the paint and add shine. With patience and careful application, you can achieve a durable and attractive finish on your vehicle’s bumper.
Introduction To Diy Bumper Painting
Spray cans are easy to use and cost-effective. They are perfect for small projects like painting a bumper. No need for expensive equipment or professional help. Spray cans provide even coverage and smooth finishes. Many color options are available in spray cans. Easy to find at local stores or online. Quick drying time ensures a faster project completion.
DIY projects save money and give a sense of achievement. Learning new skills is always beneficial. Personal touch adds value to the project. Control over materials and methods ensures quality. Flexibility to work at your own pace. Satisfaction of doing the job yourself is unparalleled. Customizing your vehicle becomes easier. DIY also helps in understanding your car better.
Tools And Materials Needed
You need spray cans of paint for this job. Primer spray cans are also important. Get clear coat spray cans for the final touch. Sandpaper is required for smooth surfaces. You need masking tape to cover areas you don’t want to paint. Plastic sheets or old newspapers help keep the ground clean. Gloves protect your hands from paint. Use safety goggles to protect your eyes. A mask helps you avoid inhaling fumes. Microfiber cloths are great for cleaning the surface.
Choose paint that matches your car’s color. Look for a color code on your car. This code helps you find the right match. High-quality spray paint gives better results. Automotive paint is best for bumpers. Don’t use regular spray paint. It won’t last long. Test the paint on a small area first. This ensures a good match. Check if the paint is weather-resistant. This helps it last longer.
Preparing Your Work Area
Clear the area of any obstructions and lay down protective coverings. Gather all necessary tools and materials within reach. Ensure proper ventilation for safety and optimal results.
Safety Precautions
Wear safety goggles to protect your eyes. Use a mask to avoid inhaling fumes. Wear gloves to keep your hands safe. Work in a well-ventilated area to avoid breathing in chemicals. Keep a fire extinguisher nearby in case of emergencies. Ensure no flammable materials are in the area. Avoid wearing loose clothing to prevent accidents.
Setting Up Your Space
Choose a clean, dry space for painting. Cover the ground with a tarp or old newspapers. Make sure you have good lighting to see your work clearly. Set up a table to hold your tools and spray cans. Keep all your materials within reach to make the process smooth. Ensure there is proper ventilation to keep fumes away. Secure the bumper so it does not move while painting.

Credit: blog.1aauto.com
Removing The Bumper
Removing the bumper ensures a smooth, even painting surface for a professional-looking finish. Spray cans provide an accessible, cost-effective method to achieve vibrant, durable results.
Step-by-step Removal
Gather all the tools needed. You will need a socket set, screwdrivers, and pliers. First, open the car hood. Locate the bolts that hold the bumper. Remove these bolts carefully. Make sure to keep them in a safe place. Next, find the screws and clips underneath. Unscrew and unclip them gently. Finally, pull the bumper away from the car. Do this slowly to avoid damage.
Tips For Easy Detachment
Label each bolt and screw. Use small bags for different parts. Take pictures before removing anything. This helps during reassembly. Work in a well-lit area. This ensures you see all parts clearly. Ask for help if the bumper is heavy. Two people can manage better than one. Use a magnetic tray to hold screws. This prevents losing small parts.
Surface Preparation
Proper surface preparation ensures a smooth paint finish on your bumper. Clean and sand the bumper thoroughly before painting.
Cleaning The Bumper
Use soap and water to clean the bumper. Make sure all dirt and grime is removed. Dry the bumper with a clean towel. Make sure the bumper is completely dry. Use a degreaser to remove any oil or grease. Wipe the bumper with a lint-free cloth. Ensure the surface is spotless.
Sanding For Smoothness
Sand the bumper to make it smooth. Use 400-grit sandpaper first. Sand in circular motions. Switch to 800-grit sandpaper for a finer finish. Sand until the surface feels smooth. Wipe off any dust with a damp cloth. Let the bumper dry completely before painting.

Credit: www.reddit.com
Applying Primer
Choose a high-quality primer for the bumper. Automotive primers are the best option. They stick well to metal and plastic surfaces. Read the labels on the primer cans. Make sure it is compatible with your paint. Using the right primer helps the paint last longer and look better.
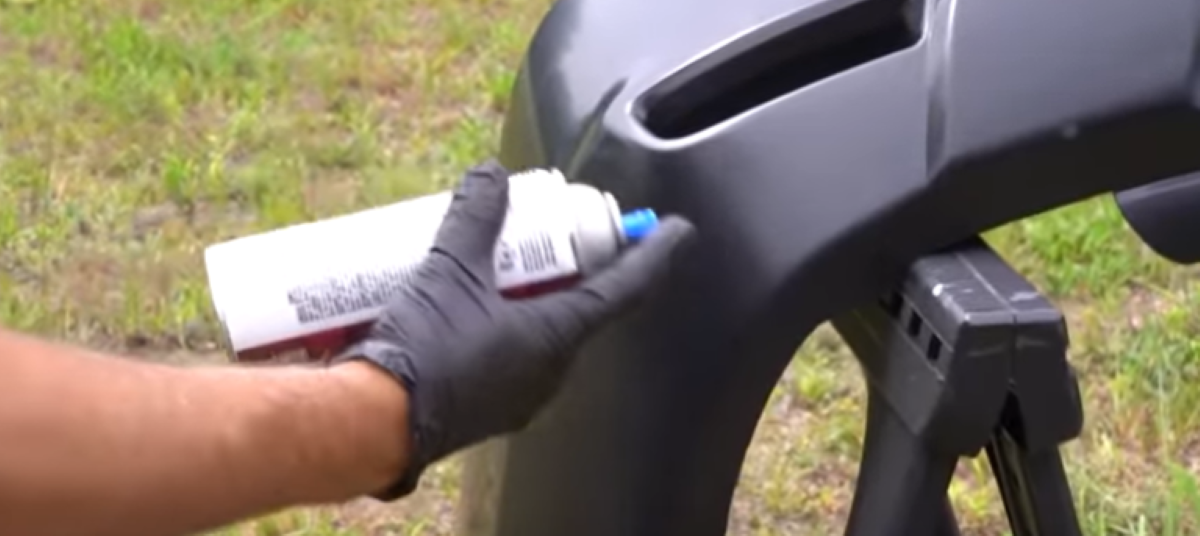
Shake the primer can for at least two minutes. Hold the can 6-8 inches away from the bumper. Spray in light, even coats. Avoid heavy spraying to prevent drips. Move the can side to side smoothly. Overlap each pass slightly. This ensures an even coating. Wait 10-15 minutes between coats. This allows the primer to dry properly.
Painting Process
Revitalize your car’s bumper with spray cans by following a straightforward painting process. Clean, sand, and prime the surface for a smooth finish. Apply even coats of paint and clear coat for a professional look.
Layering The Paint
Start with a clean surface. Use a primer to prepare the bumper. Apply the primer in thin, even layers. Wait for each layer to dry. This helps in building a smooth base. After the primer, apply the color coat. Spray in light, even strokes. Keep a steady hand and maintain a consistent distance. Allow each coat to dry before applying the next. This ensures a smooth and even finish. Finally, apply a clear coat to protect the paint. This adds a glossy finish to the bumper.
Avoiding Drips And Runs
Hold the spray can at the right distance. Usually, 6-8 inches from the surface works best. Move the can in a steady motion. Do not stay in one spot for too long. This helps in avoiding drips and runs. If drips do occur, wait for them to dry. Sand the area gently before applying another coat. This ensures a smooth finish. Always apply thin layers. Thick layers are more likely to drip and run. Patience is key for a professional-looking paint job.
Finishing Touches
Applying a clear coat is very important. It protects the paint and makes it shine. Shake the can for a few minutes. Spray evenly in a sweeping motion. Do not hold the can too close. Apply three to four coats. Wait 10 minutes between each coat. This helps the paint dry.
After applying the clear coat, let it cure and dry. Leave the bumper in a dust-free area. Allow it to dry for 24 hours. Avoid touching the surface during this time. This ensures the paint sets properly. After drying, your bumper will look shiny and new.
Reattaching The Bumper
Aligning the bumper properly is very important. Make sure all the holes line up. This will help in easy securing. Use the screws you removed earlier. Tighten them to hold the bumper in place.
Check all sides for proper alignment. Adjust if necessary. Securing the bumper tightly is crucial. This prevents it from coming loose.
Inspect the bumper for any gaps. Ensure everything is tight and secure. Look for any scratches or damages. A final check ensures a perfect fit. Make sure the bumper looks good and is safe.
Maintenance Tips
Painting a bumper with spray cans requires thorough cleaning, sanding, and masking for a smooth finish. Apply multiple light coats to avoid drips and achieve even coverage.
Cleaning And Care
Always keep the bumper clean. Use a gentle soap and water. Dry it with a soft cloth. This prevents dust and grime buildup. Dust and grime can damage the paint. Frequent cleaning is key to a shiny bumper. Avoid harsh chemicals. They can strip the paint.
Touch-up Strategies
Touch up any scratches right away. Use matching spray paint. Shake the can well. Apply in thin, even coats. This ensures a smooth finish. Allow each coat to dry before the next. Sand lightly between coats. This helps the new paint stick. Finish with a clear coat for protection. This gives a glossy look. It also seals the paint.
Troubleshooting Common Problems
Painting a bumper with spray cans often involves troubleshooting issues like uneven coverage, drips, and surface imperfections. Proper preparation and technique ensure a smooth, professional finish. Sanding thoroughly and maintaining a consistent spray distance can help achieve the best results.
Dealing With Peeling
Peeling paint can be a big problem. Always start with a clean surface. Use sandpaper to remove old paint. Make sure the surface is smooth. Apply a primer before painting. This helps the new paint stick better. Let the primer dry completely. Use thin, even coats of spray paint. Do not rush the process. Allow each coat to dry before adding another. This will help prevent peeling.
Fixing Uneven Coats
Uneven coats can ruin the look of your bumper. Start by shaking the spray can well. Hold the can at the right distance, about 10-12 inches away. Use smooth, sweeping motions. Do not stay in one spot too long. This can cause drips and uneven layers. Apply light coats and let each one dry. You can sand between coats if needed. This will help create a smooth finish.

Credit: m.youtube.com
Frequently Asked Questions
Can You Spray A Bumper With A Spray Can?
Yes, you can spray a bumper with a spray can. Clean and sand the surface first. Use even strokes for best results.
How Many Cans Of Spray Paint To Cover A Bumper?
You typically need 2-3 cans of spray paint to cover a bumper. Ensure even coverage for the best results.
Do You Need To Primer A Plastic Bumper Before Painting?
Yes, you need to primer a plastic bumper before painting. Primer ensures better paint adhesion and durability.
How To Repaint A Bumper Yourself?
To repaint a bumper yourself, follow these steps: Clean and sand the bumper, apply primer, sand again, spray paint, and apply clear coat.
Conclusion
Painting a bumper with spray cans is simple with the right steps. Follow the guide for a smooth finish. Practice makes perfect. Enjoy the satisfaction of a job well done. Your car will look refreshed and new. Share your results and tips with friends.
Happy painting!


