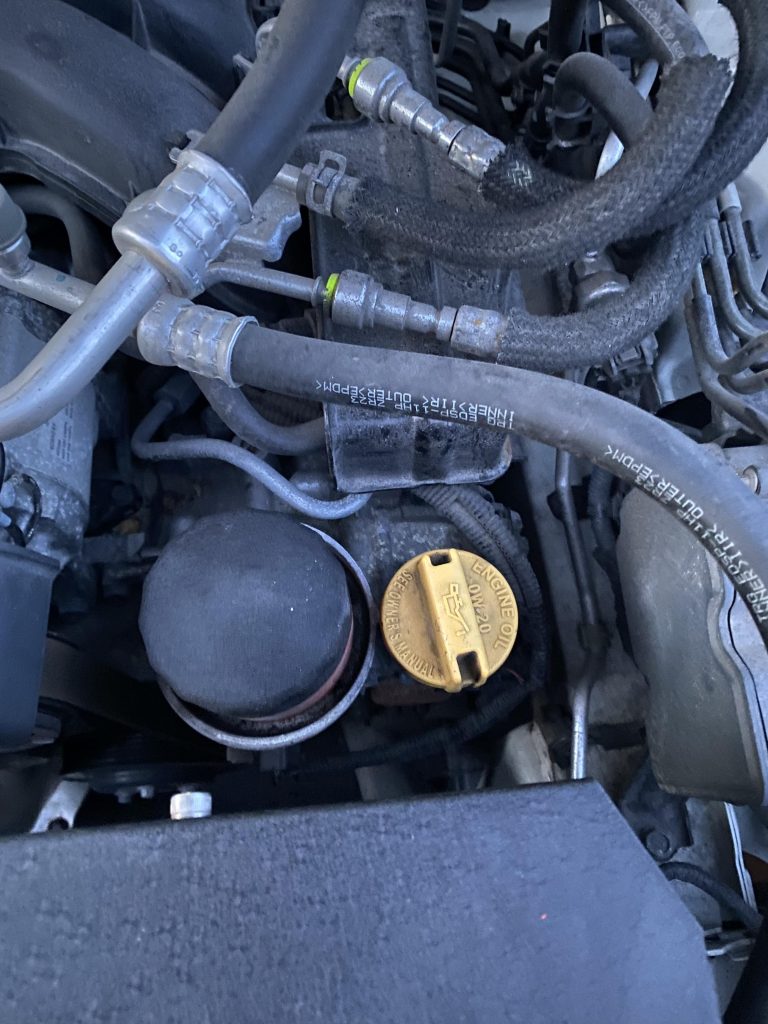
To loosen an oil cap, grip it firmly and turn it counterclockwise. Use a rag for better grip if it’s stuck.
Loosening an oil cap is a simple yet essential task for vehicle maintenance. Sometimes, oil caps become stubborn due to residue buildup or overtightening. Ensuring you have a secure grip is crucial. Using a rag or glove can help provide extra traction.
Regular checks and maintenance can prevent the cap from getting stuck in the future. Properly managing your vehicle’s oil system enhances engine performance and longevity. Always remember to tighten the cap securely after checking or adding oil to avoid leaks. This basic step can save you from potential engine issues down the line.
Introduction To Oil Cap Basics
The oil cap is a crucial part of your engine. It keeps the oil inside the engine. The oil helps the engine run smoothly. It also prevents dirt from getting in. Always check that the oil cap is on tight. A loose oil cap can cause oil leaks. Leaks can damage your engine.
Oil caps can sometimes get stuck. This can happen because of dirt or rust. It can also happen if the cap was put on too tight. A stuck oil cap can be hard to remove. It can also be frustrating. Using the wrong tools can make it worse. Always use the right tools to loosen the cap. Be patient and gentle to avoid damage.

Credit: m.youtube.com
Preparation Steps
Gather necessary tools such as a wrench and protective gloves. Ensure the engine is cool to prevent burns. Apply gentle pressure and turn the oil cap counterclockwise.
Gathering The Right Tools
First, you need to gather the right tools. You will need a wrench or oil filter pliers. A rag or paper towel can also help. Make sure all tools are clean. This helps to avoid dirt getting into the engine.
Ensuring Safety First
Safety is very important. Make sure the car is off. The engine should be cool to touch. Wear gloves to protect your hands. Safety glasses can keep oil out of your eyes. Check for any leaks before starting. If you see any, fix them first.
Identifying The Oil Cap
Locate the oil cap on your vehicle’s engine for easy access. Twist it counterclockwise to loosen and remove. Make sure the engine is cool before handling.
Location In Different Car Models
The oil cap is usually found on the top of the engine. It is often a black or yellow cap. Different car models may have different oil cap locations. In some cars, the cap might be on the left side of the engine. In others, it could be on the right side. Some cars even have it in the middle. Check the car manual to find the exact spot. The manual will have a diagram. This helps in locating the oil cap quickly.
Recognizing An Oil Cap
An oil cap often has an oil can symbol on it. This symbol makes it easy to recognize. The cap is usually round and can be turned by hand. Some caps might be a bit tight. You may need to use a cloth for a better grip. Make sure the engine is cool before touching the cap. A hot engine can cause burns.
Credit: www.e90post.com
Initial Loosening Techniques
Use your hand to twist the oil cap counterclockwise. Make sure your hand is dry. Wet hands can slip and make it harder. If the cap is stuck, try wearing rubber gloves. The gloves can give you a better grip. If it still won’t move, take a break and try again. Sometimes a little rest helps.
Use a small hammer or a tool to tap the oil cap gently. Tap around the edges of the cap. This can help to loosen any dirt or rust that is keeping it stuck. Do not hit too hard. A gentle tap is often enough. After tapping, try the hand-twisting method again.
Advanced Strategies
Gripping the oil cap with pliers can make a big difference. Always use pliers with a strong grip. Wrap a cloth around the cap to avoid damage. Turn the pliers slowly to loosen the cap. Applying too much force can break the cap. If the cap feels stuck, take a short break. Try again with gentle pressure.
Penetrating oil can help loosen a stuck oil cap. Spray a small amount around the base of the cap. Wait for a few minutes so the oil can work. Use a clean cloth to wipe away excess oil. Try turning the cap again. If it is still tight, apply more oil. Repeat the process until the cap loosens.
Dealing With A Stuck Cap
Struggling with a stuck oil cap? Apply gentle pressure while turning counterclockwise. Use a rubber grip or cloth for better traction.
Heat Application
Sometimes oil caps get stuck. Using heat can help loosen them. A hairdryer or heat gun works well. Aim the heat at the cap for a few minutes. This makes the metal expand slightly. Try to turn the cap while it’s still warm. Be careful not to burn yourself. Wear gloves for safety. If the cap still won’t move, repeat the process. Sometimes it takes a few tries.
When To Seek Professional Help
Seek professional help if the cap won’t budge. Mechanics have special tools. They can remove stuck caps safely. Don’t force the cap too hard. This could damage the engine. It’s better to let a professional handle it. They can also check for other issues. Sometimes a stuck cap is a sign of a bigger problem.
After Removal Care
Clean the oil cap using a soft cloth. Remove any dirt and debris that may be present. Use a mild cleaner if needed. Ensure the cap is completely dry before putting it back.
Check the oil cap for any cracks or damage. Look for worn-out seals. If any damage is found, replace the oil cap immediately. A damaged oil cap can cause leaks and engine problems.
Reinstallation Tips
Make sure to tighten the oil cap securely after use. Use a firm grip to ensure it is tight. Check that it is not too loose or too tight. This helps to prevent leaks. A properly tightened oil cap ensures your engine stays clean.
Avoid cross-threading by aligning the threads properly. Start by hand to feel the threads engage. Do not force the cap if it does not turn easily. Cross-threading can damage the cap and the oil tank. Take your time to ensure correct threading. A well-threaded cap will seal properly and prevent issues.
Maintenance And Prevention
Clean the oil cap regularly to prevent dirt build-up. Use a clean cloth to wipe off any grime. Ensure the area around the cap is also clean. Dirt can cause the cap to stick. Regular cleaning helps the cap stay loose.
Apply a small amount of oil to the threads of the cap. Lubrication helps the cap turn easily. Make sure not to use too much oil. Excess oil can drip into the engine. Check the cap for any signs of wear. Replace if needed to keep it working well.
Troubleshooting Common Issues
Leaks around the oil cap can be a problem. Make sure the oil cap is tight. Check the rubber gasket for damage. A damaged gasket can cause leaks. Replace the gasket if it is worn out. Oil caps that are not tight can also leak. Tighten the oil cap securely to stop leaks.
An oil cap that won’t stay on can be frustrating. Check the threads on the oil cap. Damaged threads can make the cap loose. Replace the oil cap if the threads are damaged. Make sure the cap is the correct size for your engine. A wrong-sized cap won’t fit properly. Press down firmly when tightening the cap. This ensures the cap stays in place.
Summary And Best Practices
Use the right tools like a wrench or pliers. Turn the oil cap counterclockwise to loosen it. Apply steady pressure while turning. Wear gloves to protect your hands. Check the oil level after removing the cap. Replace the cap tightly after checking the oil.
Always work on a cool engine to avoid burns. Keep tools away from the engine while it’s running. Dispose of old oil properly to protect the environment. Wash your hands after handling oil. Store oil and tools safely out of reach of children.

Credit: www.reddit.com
Frequently Asked Questions
Which Way Do You Turn The Oil Cap?
Turn the oil cap counterclockwise to remove it. Twist it clockwise to tighten it securely.
Can You Open An Engine Oil Cap When Hot?
Opening a hot engine oil cap can be dangerous. Wait until the engine cools to avoid burns and spills.
How Does An Oil Cap Pop Off?
An oil cap can pop off due to pressure buildup, improper installation, or a faulty gasket. Always ensure it’s tightly secured.
What Happens If Engine Oil Cap Is Loose?
A loose engine oil cap can cause oil leakage, reduced engine performance, and potential engine damage. Always ensure it’s tightly secured.
Conclusion
Loosening an oil cap doesn’t have to be a daunting task. With the right tools and techniques, it’s simple. Remember to always prioritize safety and follow your vehicle’s manual. Regular maintenance ensures your engine runs smoothly. By mastering these steps, you can confidently manage your car’s oil changes.


