Bench testing a temperature gauge is a straightforward way to verify that it works correctly before installing it in a vehicle.
Here’s a step-by-step guide to bench test a temperature gauge:
Tools and Materials You’ll Need:
- Temperature gauge
- Temperature sending unit (sensor)
- 12V power source (battery or power supply)
- Wiring (to connect the gauge and sensor)
- Multimeter (optional, to verify readings)
- Pot of boiling water and thermometer (to simulate engine temperature)
How to Bench Test a Temperature Gauge Properly
Bench testing a temperature gauge is an essential step to ensure it’s functioning properly before installing it in a vehicle. Whether you’re troubleshooting a faulty reading or verifying a new gauge, this process allows you to check the accuracy of the gauge without the need for a full installation.
In this guide, we will walk you through how to bench test a temperature gauge using simple tools and techniques, ensuring your gauge is ready to provide accurate temperature readings for your vehicle’s engine.
Step 1: Understand the Connections
Most temperature gauges have three or four terminals:
- Ground (GND): To complete the circuit.
- Ignition (IGN): Power input, usually 12V.
- Signal (S): Connects to the temperature sending unit (sensor).
- Optional illumination terminal: For backlighting the gauge.
Step 2: Set Up the Wiring
- Connect the ground: Using a wire, connect the ground terminal (GND) of the temperature gauge to the negative terminal of the power supply or battery.
- Connect the power: Attach the ignition terminal (IGN) to the positive terminal of the 12V battery or power supply.
- Connect the signal terminal: Connect the signal (S) terminal of the gauge to the output of the temperature sending unit (sensor).
- Ground the sensor: Ensure the body of the temperature sending unit is grounded by connecting it to the negative terminal of the battery or power supply.
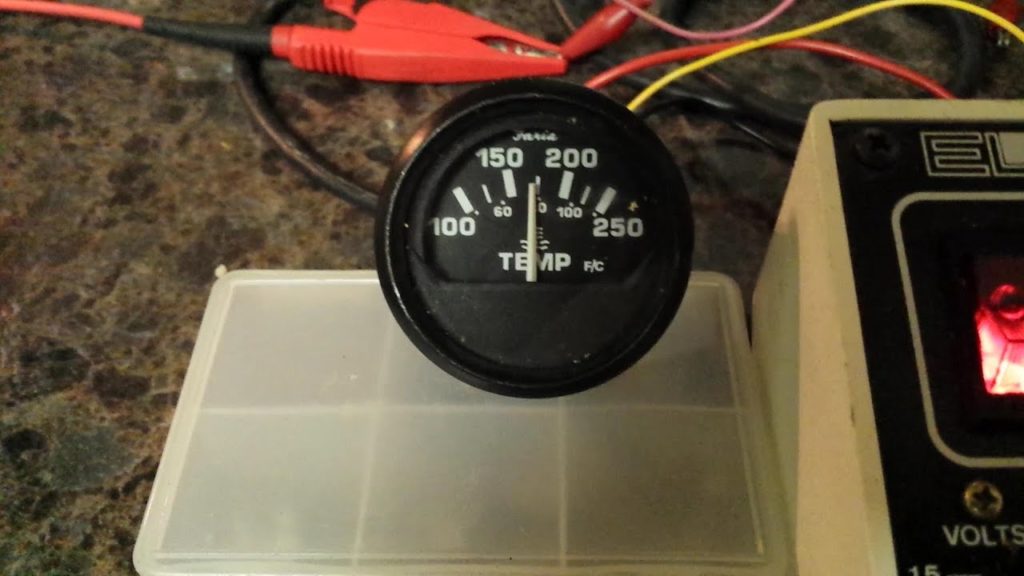
Step 3: Test the Gauge with Boiling Water
- Heat water: Boil a pot of water or heat it to a known temperature using a thermometer.
- Submerge the sensor: Place the temperature sending unit into the hot water. The sensor will read the temperature of the water.
- Observe the gauge: As the sensor detects the water temperature, the temperature gauge should begin to move, showing the corresponding temperature.
- If the gauge moves smoothly and displays a temperature range corresponding to the water temperature, it’s working correctly.
- If the gauge doesn’t move or behaves erratically, there may be a problem with the gauge or sensor.
Step 4: Test with Different Temperatures
To verify accuracy, you can test the sensor at different temperature levels:
- Use hot and cold water: Place the sensor in cold water, then in warm, then hot water, and observe the gauge.
- Monitor the readings: The gauge should move in sync with the temperature changes, reflecting a low reading in cold water and a higher reading in hot water.
Step 5: Check Continuity with a Multimeter (Optional)
If you want to verify that the gauge and sensor are functioning electrically:
- Set the multimeter to measure resistance (ohms).
- Test the sensor: Place the multimeter leads on the terminals of the temperature sensor and check if the resistance changes as the temperature of the sensor changes (e.g., as you submerge it in water). This ensures the sensor is responsive.
Step 6: Troubleshoot (if necessary)
If the gauge doesn’t move, consider these troubleshooting steps:
- Check the wiring: Ensure all connections are secure and correct.
- Test the power source: Verify that the battery or power supply is delivering 12 volts.
- Test the sensor: Use a multimeter to check if the sensor is generating a signal as it heats up. If the sensor is faulty, the gauge will not work properly.
- Test the gauge directly: If you suspect the sensor is bad, you can simulate the signal from the sensor by connecting a resistor to the signal terminal of the gauge.
How to Test a Temperature Gauge With a Multimeter
Testing a temperature gauge with a multimeter is relatively simple.
First, make sure the engine has cooled down and turn off any power sources connected to the car’s electrical system. Then disconnect the negative battery terminal from the car’s body or frame to avoid any potential shocks from electricity.
Next, attach your multimeter leads to both terminals on the temperature gauge, set your meter to ohms (Ω), and check that it reads 0 when at room temperature.
If not, you may need to adjust its calibration using a small screwdriver until it reads 0 Ω at room temperature before testing further.
How to Test a Single Wire Coolant Temperature Sensor
Testing a single wire coolant temperature sensor is relatively easy.
First, disconnect the negative battery terminal and locate the sensor on your vehicle’s engine block. Using an ohmmeter or multimeter, measure the resistance of the sensor to determine if it’s within operating range as specified in your service manual.
If not, replace it with a new one.
Finally, reconnect the negative battery terminal and start up your car to test that everything is functioning properly.
How to Test a Temperature Sensor Hvac
Temperature sensors are an important part of any HVAC system, as they help to regulate the temperature within a home or building. To ensure that your system is working correctly, it’s important to test the temperature sensor regularly.
Testing a temperature sensor requires access to the wiring and control board, so be sure that you know what you’re doing before attempting this task.
Once inside, check for loose connections first and then measure its resistance using an ohmmeter. Check against manufacturer guidelines for acceptable readings; if there is a discrepancy then you may need to replace the sensor.

Credit: www.corvetteforum.com
How Do I Know If My Temperature Gauge is Bad?
If you’re wondering whether your temperature gauge is bad or not, it’s important to pay attention to the warning signs.
The most obvious sign that something is wrong with your temperature gauge is if the needle never moves from its resting position, even when you turn on the engine and allow it to warm up. If this happens, then either the sensor or wiring has an issue and needs to be addressed immediately as overheating can cause serious damage to your vehicle’s engine components.
Other signs that might indicate a faulty temperature gauge include a needle that fluctuates erratically or does not move quickly enough in response to changes in engine temperature. It could also mean that there are electrical issues with either the sending unit or with other parts of the instrument cluster such as fuses and relays.
In any case, if you suspect there may be an issue with your temperature gauge it’s best practice to have it inspected by a professional mechanic so they can determine what exactly needs fixing before any further damage occurs.
How Can I Tell If My Temperature Gauge is Working?
When it comes to understanding if your car’s temperature gauge is working properly, there are a few different indicators to look out for.
First and foremost, you’ll want to check the radiator cap for any damage or wear as this can cause the temperature gauge readings to be inaccurate.
Additionally, make sure that all of the hoses connected to the engine are in good condition and not leaking coolant.
If everything looks alright here, then you should start up your vehicle and wait until it reaches operating temperature before checking the gauge itself. At this point you should be able to see if the needle on your thermometer is rising or falling when your car heats up or cools off respectively.
Another way of determining if your gauge is functioning correctly is by comparing its readings with those from another reliable source such as an external thermometer or other diagnostic tools available at automotive stores.
Ultimately, keeping an eye on how consistently accurate these readings are will give you a good idea of whether or not something might need servicing soon so that potential future problems can be avoided altogether!
Conclusion
This blog post provided comprehensive instructions on how to successfully bench test a temperature gauge. From choosing the right materials and tools, to connecting the gauge, steps were laid out in detail making it easy for any user of any skill level to understand. Testing your temperature gauge is an important part of maintaining accurate readings and ensuring that you can trust the results from this instrument.
Following these simple procedures should help ensure that your temperature gauges are working properly so that you can make informed decisions about temperatures accurately and precisely.